So you’ve just flashed or purchased your new router, now it’s time to join the network and create a connection to the internet.
Unlike traditional networking systems with Althea you only need to concern yourself with physically making a link to a nearby member of the network. There’s no technical configuration required.
If you have no neighbours nearby to connect to visit the port toggling guide to enable Gateway mode on your router and skip ahead to the router setup guide. Your Althea router will act as a whole home VPN and you can come back when you’re ready to connect to neighbours.
You should try and make as many links to other members of the network as possible, the more people you are connected to the more reliable your connection becomes as Althea seamlessly selects the best path for your internet traffic every second.
-
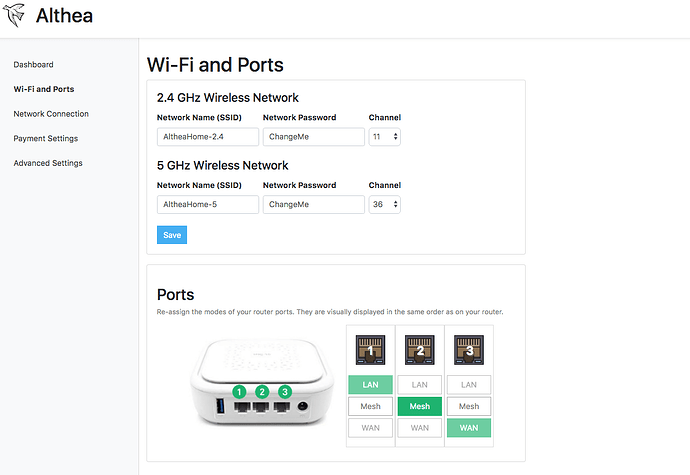
First inspect the connectivity your router provides. Althea uses ‘mesh ports’ to allow users to make links with a variety of hardware. When setting up a link you will simply plug your antenna or other device into a mesh port on your router.
In addition to mesh ports there are also ‘LAN’ and ‘WAN’ ports. The WAN port goes to a ‘traditional’ internet connection and bridges that internet connection into the network for resale.
LAN ports on Althea devices are where you would plug in a desktop or a laptop if you do not want to use WiFi.
You can see what ports perform what functions by visiting the router dashboard and checking out the WiFi and Ports section
You can modify these on the router settings page of the Althea dashboard to better suit your needs, including rearranging the default port map to your liking.
-
Next you need to select appropriate hardware to make your connection.
a) Creating links in Urban environments
b) Creating links in Suburban environments
c) Creating links in Rural environments -
Now that you’ve made your connection it’s time to check if it’s working properly. Try to set up your router. If the exit node selection list is all red you’ll need to go back to the link guide and start troubleshooting.
